 English
 Español
 中文
中文News
Home / News / Industry News / The Complete Guide to Cutting and Soldering Copper Square Tubes with Precision and Safety
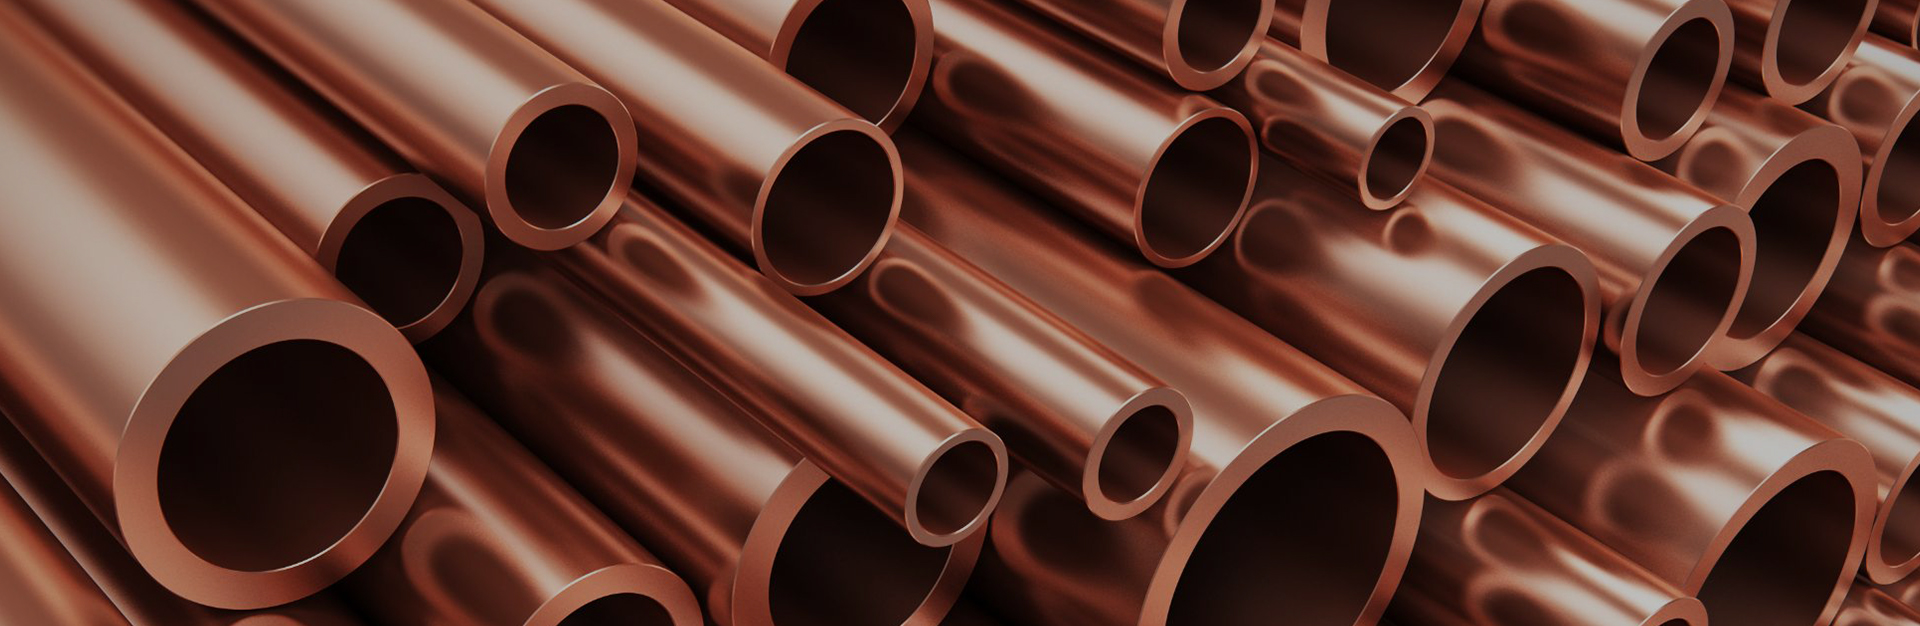
Copper square tubes are specialized extrusions that combine the superior conductivity, corrosion resistance, and workability of copper with the structural stability of a square profile. These tubes are typically fabricated through extrusion or drawing processes, resulting in seamless or welded forms with varying wall thicknesses and side dimensions. The square geometry provides specific advantages in applications where flat mounting surfaces, aesthetic symmetry, or precise alignment is required. At the metallurgical level, most copper square tubes are made from commercially pure copper or deoxidized grades, which ensure compatibility with soldering and brazing techniques. The most widely used grades include C11000 (Electrolytic Tough Pitch Copper) and C12200 (Phosphorus Deoxidized Copper). C110 is noted for its exceptional electrical conductivity—up to 101% IACS—and is preferred for electrical and thermal transmission applications. Meanwhile, C122 is more commonly used in plumbing and HVAC systems due to its enhanced weldability and resistance to hydrogen embrittlement. These grades exhibit excellent malleability and ductility, allowing them to be bent or formed with minimal risk of cracking. In terms of mechanical properties, copper square tubes generally offer tensile strength between 200 and 400 MPa depending on temper, with high fatigue resistance and low magnetic permeability. The thermal conductivity ranges from 360 to 400 W/m·K, making them highly efficient in heat transfer applications. Their corrosion resistance, particularly in water, non-oxidizing acids, and saline environments, also makes them a material of choice for marine and architectural components.
In practical usage, copper square tubes serve diverse industries. In construction, they are used in decorative facades, railing systems, and structural supports where both appearance and function are crucial. In plumbing, these tubes are incorporated into manifolds, pressure control assemblies, and subframes where square profiles enable tighter integration with flat surfaces or wall-mounted devices. In the HVAC industry, square copper tubes are increasingly found in compact heat exchangers and coil frameworks due to their thermal efficiency and form factor. In electrical systems, especially busbars and ground grids, the uniform cross-section ensures predictable current flow and easier mounting on panels or insulators. Copper square tubes also see application in automotive and aerospace sectors where precision-fitted cooling circuits, fuel lines, or sensor housings require strong but workable materials with excellent fatigue resistance. Laboratories and semiconductor equipment utilize square copper tubing for high-purity gas lines and thermal enclosures, given copper’s cleanliness and inert nature when processed correctly. In artistic and custom fabrication, copper square tubes are valued for their warm luster, patina development, and the ability to be TIG welded or mechanically fastened into rigid assemblies.
The availability of copper square tubes in different tempers—annealed (soft), half-hard, or full-hard—further extends their usage profile. Annealed tubes are easily bent and suitable for manual shaping, while half-hard or hard tempers offer greater dimensional stability and load-bearing strength. Wall thicknesses typically range from 0.5 mm to 5 mm, and side lengths span from 5 mm to over 100 mm, depending on the application. Manufacturers often offer custom lengths and finishes, including mill finish, brushed, or coated, to suit environmental and aesthetic requirements. Copper tubes may be plated with tin or nickel in specialized electronic or high-corrosion environments. Their compatibility with standard plumbing and HVAC fittings—including compression, flare, and solder-type connectors—ensures seamless integration into existing systems. Copper’s bacteriostatic properties, which inhibit microbial growth on the surface, also contribute to its use in sanitary water delivery and hospital infrastructure. Overall, copper square tubes represent a well-rounded engineering material where mechanical integrity, thermal and electrical performance, and long-term durability intersect.
Precision cutting of copper square tubes requires a tailored selection of tools that align with the material’s properties, wall thickness, and application context. Unlike round tubing, square profiles introduce complexities in terms of edge alignment, rotational symmetry, and cutting path control. Selecting the right tools is not merely about achieving the desired cut length but also preserving the tube’s integrity and avoiding deformation, cracking, or excessive burr formation. The first category of tools includes manual cutting instruments such as hacksaws and tube cutters. Hacksaws equipped with high-tension frames and bi-metal blades (typically 24–32 TPI) can be used for small-scale cuts on thin-walled copper square tubes. However, they require steady control to avoid blade wander and uneven cuts. Tube cutters with adjustable jaws are designed primarily for round tubes, but some specialized square-tube cutters are available with four-point wheel systems for uniform pressure distribution. These are useful for achieving clean cuts with minimal burrs and are ideal for fieldwork or quick repairs.
For larger or thicker copper square tubes, power tools such as miter saws, band saws, and cold saws are recommended. Miter saws equipped with fine-toothed carbide-tipped blades can deliver accurate, square cuts, especially when paired with a jig or clamping fixture to prevent tube rotation. Abrasive cutoff saws are not ideal for copper due to the risk of material softening and edge glazing from heat buildup. Instead, band saws with fine-tooth metal-cutting blades (minimum 18 TPI) are preferred for consistent cuts through thick or hardened copper profiles. Variable speed controls allow operators to adjust blade RPM to match copper’s low work hardening rate, reducing tool wear and vibration. Cold saws, which use circular HSS or carbide blades at slower rotational speeds, provide precise cuts with a smooth finish and minimal heat generation. These are ideal for shop-floor production where cut quality and dimensional consistency are critical. Rotary tools such as Dremels or die grinders fitted with cutting discs can be used for intricate or confined cuts, although they lack the straight-edge consistency needed for structural applications.
In addition to cutting tools, proper support equipment plays a critical role. Tube vises and bench clamps designed with padded or curved jaws prevent crushing or scarring of the copper during fixation. For automated or production-level operations, CNC saw systems and laser guides may be implemented to control cut angles and lengths down to the millimeter. Lubrication—often in the form of light cutting oil or specialized copper-compatible coolants—reduces friction, prevents overheating, and prolongs blade life. However, overuse of oil can contaminate the tube surface, requiring additional cleaning before soldering or welding. Measurement tools such as digital calipers, laser rulers, and machinist squares ensure the accuracy of markings before the cut. Marking should be done with scribe tools or non-contaminating ink pens to avoid chemical reactions with copper during heating or cleaning.
Dust and chip management are also considerations during the cutting process. Copper shavings can cause short circuits or thermal issues if left in electrical or HVAC environments, so a clean workbench equipped with vacuum extraction or magnetic trays improves safety and cleanliness. For edge finishing, deburring tools such as chamfer reamers, flat files, or nylon brushes are used to clean up the inner and outer tube walls post-cut. In more advanced fabrication environments, orbital tube cutters and rotary blade systems offer non-deforming cuts using encircling blades that gradually score and slice through the copper wall without compressing the profile. These are especially effective in aerospace, semiconductor, or cleanroom applications where dimensional fidelity is paramount.
The selection of tools must align with several factors: tube dimensions, required precision, cut volume, work environment, and post-processing steps such as soldering or brazing. For occasional on-site work, portable tools with adjustable features offer flexibility. For repeatable, high-volume production, fixed-station power saws with jigs and cooling systems are more suitable. In all cases, choosing the right tool not only improves cut quality but also reduces the risk of tube damage, saves time in post-processing, and contributes to overall project efficiency and safety.
Proper preparation before cutting copper square tubes is essential to achieving straight, accurate cuts with minimal waste and deformation. The preparation phase includes three key steps: precise measuring, accurate marking, and firm clamping. These steps directly affect the outcome of the cut and are particularly critical when working with copper due to its softness and susceptibility to damage under improper handling. The first aspect of preparation is accurate measurement. Copper square tubes often need to fit into specific dimensional tolerances, particularly in applications such as HVAC brackets, architectural frames, or pipe manifolds. The use of precision measuring tools such as vernier calipers, digital micrometers, and steel rules is recommended over general-purpose tape measures, especially for tubes below 50 mm in side length. When measuring, ensure both the outside dimensions (OD) and inside clearances are taken into account, as square tubing often features nominal external dimensions that may vary slightly depending on manufacturing tolerances. For longer tubes or repeated cuts of the same length, a stop block or template jig should be used to avoid cumulative measurement errors.
Once the measurement is taken, the next step is marking. Marking copper square tubes requires tools that provide both precision and visibility without damaging the surface. A scribing tool with a hardened steel tip can be used to etch a fine line on the tube surface. For softer grades or where cosmetic appearance is a concern, permanent markers or paint pens may be used, although they must be fully removed before any soldering operation to avoid flux contamination. When marking, it is essential to wrap the mark around all four faces of the tube to ensure the cutting line is visible regardless of tool orientation. A combination square or machinist's square is extremely useful here to carry the line across perpendicular faces and maintain alignment. When multiple cuts are required from the same piece of tube, especially in series production, consider marking each segment at once to save time and reduce error.
After marking, the tube must be securely clamped to avoid vibration, movement, or crushing during cutting. Clamping copper square tubes can be challenging due to their shape and material softness. Standard bench vises or clamps may deform the walls if tightened excessively. Therefore, protective jaws made of nylon, rubber, or soft metal should be used to grip the tube evenly. Specialized V-blocks or tubing clamps with square profiles are ideal, as they provide uniform support across all faces of the tube. When clamping, always ensure that the marked cutting line is fully visible and accessible, and that the tube is level relative to the cutting blade. Misalignment at this stage will translate directly into uneven or beveled cuts, which may compromise joint integrity during soldering. For powered cutting tools such as miter saws or band saws, the use of a sacrificial backing board behind the tube is recommended to prevent exit burrs and improve edge quality. Additionally, ensure that the tube is clamped close to the cutting point to reduce tool chatter or material flex. In some cases, especially with long tubing sections, additional support stands or rollers may be needed to keep the tube aligned and prevent sagging. These preparation techniques, when executed carefully, ensure that the cutting process is smooth, accurate, and repeatable, setting the foundation for high-quality fabrication and assembly in the following steps.
Cutting copper square tubes with high accuracy involves a series of coordinated steps, beginning with workspace setup and tool calibration and ending with post-cut inspection. The goal is to produce clean, square cuts with minimal burrs or deformation while maintaining dimensional tolerances suitable for fitting and soldering. The first step is to prepare the workspace. A clean, stable surface with sufficient lighting is essential. Ensure that all tools—saws, blades, clamps, measurement instruments—are within easy reach and functioning correctly. If using power tools, verify that they are securely mounted and the blade is appropriate for non-ferrous metals. The cutting area should also include a debris collection system, such as a vacuum or chip tray, to maintain cleanliness and prevent metal fragments from contaminating the tube interior or surrounding equipment. Before starting the actual cut, the marked tube should be double-checked for measurement accuracy and then clamped securely into place, as outlined in the previous section.
The second step is tool alignment and blade positioning. For manual cutting with a hacksaw or tubing cutter, the blade should be aligned precisely with the marked line and initiated with light pressure to establish a groove. This groove will act as a guide and prevent the blade from slipping during the main cut. For powered tools like a band saw or cold saw, the blade height and lateral positioning should be set such that the blade enters the tube perpendicular to its face. Misalignment at this stage can lead to angled cuts, excessive burrs, or blade binding. Once alignment is confirmed, begin the cutting process with consistent, controlled motion. In manual cutting, apply light to moderate pressure and let the teeth of the blade do the work; excessive force can distort the tube walls or cause the blade to deflect. For powered cutting, initiate the blade and slowly feed the tube into the path of the saw, maintaining steady feed rate and pressure.
The third step is to monitor the cut for heat buildup and material shift. Although copper dissipates heat well, prolonged cutting—especially with abrasive or friction blades—can cause localized softening or discoloration. Applying a small amount of cutting oil or water-based coolant can reduce heat and prolong blade life. Periodically pause the cut to inspect for burr formation, misalignment, or signs of deformation. In powered setups, never force the tube through the blade faster than the tool’s rated cutting speed; doing so can result in a rough edge, excessive material removal, or even tool damage. As the blade reaches the far side of the tube, reduce feed pressure slightly to prevent chipping or ragged edges on the exit side.
The fourth step is finishing and inspection. After the cut is complete, remove the tube from the clamp and inspect the cut face for straightness and surface quality. Use a machinist's square to check for squareness, and a caliper to verify that the cut length matches the intended measurement. If any burrs are present, remove them using a deburring tool, flat file, or abrasive cloth. Both the inner and outer edges should be smoothed, particularly if the tube will be used in fluid systems or fitted with other components. For critical applications, a light sanding of the entire cut face may be performed to ensure optimal surface preparation for soldering or joining. If the cut was part of a multi-step fabrication process, label the tube segment to maintain identification and ensure traceability during assembly.
Throughout the cutting process, consistency and attention to detail are key. By following this systematic approach, users can achieve professional-grade results that support downstream processes such as soldering, brazing, or mechanical fastening. Whether cutting copper square tubes for HVAC systems, architectural installations, or custom electrical assemblies, the ability to make clean, repeatable cuts ensures structural reliability and aesthetic quality in the final product.
When cutting copper square tubes, achieving a clean, straight cut is a critical step in ensuring that the final product meets dimensional tolerances and is ready for downstream operations like soldering or assembly. However, there are common mistakes that fabricators often encounter during the cutting process. Understanding these errors and implementing strategies to avoid them can save time, reduce waste, and prevent damage to the material. The first mistake is incorrect tool choice. Copper square tubes require specific tools depending on the thickness of the material and the volume of cuts. Using a saw blade designed for wood or plastics, for example, can lead to uneven cuts, excessive burr formation, or blade dulling. For copper, especially thicker materials, a saw with fine teeth and designed for metal cutting, such as a band saw or cold saw, should be used. The blade material, typically made of high-speed steel (HSS) or carbide, ensures longevity and cutting precision. Another tool-related mistake is using dull blades. Over time, even high-quality saw blades wear down, and dull blades cause the copper to heat up more than necessary, leading to discoloration, hardened edges, and a rough cut surface. It’s essential to replace or sharpen blades regularly to maintain cut quality. If the blade is too dull, it can also generate excessive friction, increasing the chance of the tube bending or warping as it’s cut.
The second mistake is poor alignment during the cutting process. Misalignment can occur in both manual and power tools, leading to cuts that are angled or offset, which can compromise the integrity of the tube and lead to poor fitting when assembled. For manual tools like hacksaws, the operator must carefully maintain the saw’s position and angle. Even slight shifts can cause the cut to go off-square, especially with the square geometry of copper tubes. For powered tools, like miter saws or band saws, ensuring that the tube is aligned precisely with the blade is crucial. A slight misalignment in the saw or the clamping system can cause uneven cuts, leading to difficulties in joining tubes or making the tube unsuitable for its intended application. Using jigs, clamps, or fixtures designed specifically for square tubing can help align the material properly and reduce the risk of angle deviations.
Another mistake frequently made during the cutting process is improper clamping. Clamping copper square tubes too tightly or incorrectly can result in damage to the material. Over-tightening the clamp can cause the soft copper to deform, creating bends, dents, or even cracks along the clamped edges. Additionally, an uneven clamping force can lead to the tube shifting or slipping during the cut, which may cause inaccuracies or unwanted burrs. To avoid this, it's important to use clamps that apply even pressure across the full surface of the tube without over-tightening. Using soft padding on the jaws of the clamps, such as rubber or nylon, can help prevent damage to the tube and ensure a firm but non-deforming grip. Additionally, ensuring that the tube is well-supported along its length, particularly for longer sections, can reduce the risk of sagging or bending as the cut is made.
Heat buildup is another common issue when cutting copper square tubes. Copper, being a good conductor of heat, will rapidly dissipate heat during cutting. However, excessive friction, especially when using abrasive tools or cutting too quickly, can result in localized heating, which softens the copper, making it more prone to deformation or discoloration. To avoid heat buildup, it is advisable to use cutting lubricants or coolants during the process. Light oil or water-based coolants can help reduce friction and dissipate heat, maintaining the integrity of the copper. Additionally, slowing down the cutting process or using a tool that reduces friction, such as a cold saw, can also prevent overheating.
Lastly, burr formation is an inevitable consequence of cutting metal, but it can be minimized with the proper technique. Burrs, especially on the inside of the copper tube, can obstruct fluid flow in plumbing or HVAC applications, while external burrs can hinder proper fitting during assembly. Burrs should be removed immediately after cutting to ensure the tube fits correctly with other components. This can be done using deburring tools, files, or abrasive pads. It is crucial to ensure that all surfaces, both inner and outer, are smooth and free from debris, particularly when preparing copper tubes for soldering or brazing.
Safety is a critical concern when working with copper square tubes, especially during cutting operations, which involve sharp blades, rotating equipment, and the potential for flying metal shards or dust. Taking the right precautions and following safety guidelines can help prevent injury and ensure a safer working environment. The first step in safety is the proper use of Personal Protective Equipment (PPE). When cutting copper square tubes, safety goggles are essential to protect the eyes from flying debris, sparks, or metal fragments that can result from the cutting process. Even when using non-abrasive cutting methods, small shavings of copper can be projected at high speeds, so wearing impact-resistant eye protection is a must. Additionally, hearing protection should be worn when using power tools like saws, especially those with high RPMs, as the noise can reach harmful levels. A simple pair of earmuffs or earplugs can prevent long-term hearing damage.
Gloves are another essential part of PPE. While copper is relatively soft compared to other metals, it can still have sharp edges, especially after cutting. Wearing cut-resistant gloves made of materials such as Kevlar or stainless steel mesh provides protection against cuts and abrasions, particularly when handling freshly cut copper tubes. It is important, however, that gloves are not too bulky or tight, as they may affect dexterity and increase the risk of accidents while handling small parts or adjusting the cutting tools.
For workers handling larger sections of copper square tubes or using power tools for extended periods, a durable apron or protective sleeves can help shield the body from potential sparks, flying debris, or hot surfaces. When working with power saws or grinders, sparks are often generated, so wearing flame-retardant clothing is advised to prevent burns or fire hazards. Additionally, it is recommended to wear steel-toed boots to protect the feet from falling tools or heavy pieces of copper tube during the handling process.
In addition to personal protection, proper ventilation is essential when cutting copper tubes, especially if any heat is generated or if lubricants or coolants are used. Many cutting oils and sprays contain chemicals that can emit fumes or vaporize when exposed to heat, potentially leading to respiratory issues. Ensuring good ventilation in the work area can help dissipate harmful fumes and prevent inhalation of any particles. Ideally, a work area should be equipped with an exhaust fan, especially if cutting is performed indoors or in an enclosed space. If necessary, a respirator or dust mask can be worn to protect against inhalation of copper dust or vapors produced during the cutting process. These devices are particularly useful if the cutting involves abrasive tools or if the copper is heated, as fine metal particles and smoke can be harmful when inhaled.
Proper handling of copper square tubes is also a vital aspect of workplace safety. Copper is a relatively soft material and, while easy to work with, can still cause injury if mishandled. Large tubes should be lifted using proper lifting techniques, such as bending the knees and keeping the back straight to avoid strain or injury. Copper tubes should also be stored safely to prevent accidental tripping or falling, particularly when stacked in large quantities. Using racks or shelving systems designed to hold long pieces of material is recommended to keep the copper stable and secure. Additionally, when transporting copper square tubes, especially longer sections, it is important to ensure they are fully supported and securely fastened to prevent slipping or rolling during movement.
Keeping the work environment clean and organized is essential for safety. Spilled copper shavings, cutting fluid, or debris can create slippery surfaces or fire hazards. Regularly cleaning the work area and disposing of waste in appropriate containers reduces the risk of accidents. Keeping tools and equipment in good working order and properly maintained is also important for minimizing the risk of tool malfunction or injury.
Proper surface preparation prior to soldering copper square tubes is fundamental to achieving strong, leak-free joints and ensuring long-term reliability. Copper’s excellent thermal conductivity and softness make it an ideal candidate for soldering, but these same properties require meticulous cleaning and alignment to prevent joint failure. The first critical step is cleaning the copper surfaces. Copper naturally forms an oxide layer when exposed to air, which can inhibit the flow of solder and cause weak bonds. This oxide layer, along with dirt, grease, and residual oils from handling or manufacturing processes, must be completely removed before soldering. Mechanical cleaning methods, such as using fine-grade emery cloth or abrasive pads, are effective for removing surface oxides and producing a bright, metallic sheen. Care should be taken to clean all surfaces that will come into contact during soldering, including the outer faces of the tubes and the inner surfaces of fittings or sockets.
Chemical cleaning is also frequently employed, especially in industrial settings. Specialized copper cleaners or degreasers can dissolve organic residues and contaminants. These chemicals typically contain mild acids or detergents formulated to remove oils and oxidation without damaging the copper substrate. After chemical treatment, thorough rinsing with clean water and drying is essential to prevent residual chemicals from interfering with the solder or flux. Some professionals use acetone or isopropyl alcohol wipes as a final step to ensure a pristine surface. When cleaning, it is important to avoid introducing scratches or gouges on the copper surface, as these can become stress concentration points and compromise joint strength.
Following cleaning, deburring is necessary to remove sharp edges, burrs, or metal shards produced during the cutting process. Burrs on the outer edge of the tube can prevent proper seating within fittings, while internal burrs may obstruct fluid flow or trap flux and solder residues. Tools such as deburring knives, round or chamfer reamers, and fine files are commonly used for this purpose. The goal is to create smooth, chamfered edges that allow solder to flow evenly around the joint by capillary action. For copper square tubes, special attention must be paid to the internal corners, which can accumulate burrs due to the profile geometry. Deburring not only improves the mechanical fit but also reduces the risk of leak paths forming along uneven edges.
After cleaning and deburring, fitting alignment becomes the next crucial factor. Proper alignment ensures that the components fit tightly and uniformly, allowing solder to penetrate fully around the joint. Even slight misalignment can cause gaps or uneven solder distribution, resulting in weak joints or leaks. To achieve this, components are often dry-fitted prior to applying flux or solder. This allows the fabricator to check for snug, gap-free connections and adjust as necessary. In some cases, mechanical alignment aids such as jigs, fixtures, or clamps are used to hold components in place during soldering. These tools are especially valuable when working on complex assemblies or multiple joints simultaneously, maintaining consistent alignment throughout the process.
The square geometry of the tubes adds complexity to alignment compared to round tubing. Each of the four sides must meet flush with corresponding faces of fittings or adjoining tubes. Any rotational misalignment, such as twisting, can cause uneven solder gaps or poor aesthetic results. Using precision machinist squares or angle gauges during fitting can help verify correct positioning. Additionally, cleaning flux should be applied evenly to all mating surfaces after alignment to promote solder flow and prevent oxidation during heating. Inconsistent flux application can result in cold joints or solder pooling, which weaken the connection.
Thorough surface preparation involving cleaning, deburring, and precise fitting alignment is a prerequisite for high-quality solder joints in copper square tubes. Neglecting any of these steps can lead to joint failure, leaks, or costly rework. Implementing disciplined preparation protocols enhances soldering efficiency, reliability, and the overall longevity of the copper assembly.
Soldering copper square tubes requires not only appropriate materials but also skilled application of techniques that ensure strong, uniform joints. The process depends heavily on the choice of tools, the proper use of flux, and the controlled application of heat using torches. The first consideration is the selection of solder and flux. Lead-free solders composed of tin-copper or tin-silver alloys are preferred due to environmental and health regulations. These alloys typically melt between 217°C and 280°C, allowing for strong metallurgical bonding with copper without damaging the base material. Flux, a chemical agent that cleans metal surfaces and promotes solder flow, must be compatible with copper. Common flux types include water-soluble, rosin-based, and no-clean fluxes, each with advantages depending on the application environment and post-soldering cleaning requirements. Water-soluble fluxes are effective but require thorough cleaning to prevent corrosion, whereas rosin-based fluxes can be left in place if enclosed within assemblies.
Tool selection is equally important. Propane torches are widely used for their convenience and adequate heat output, while MAPP gas torches offer higher flame temperatures for faster heating. For precision work on small tubes, a pencil torch with a focused flame allows better control. The flame should be adjusted to produce a clean, blue, non-sooty inner cone, which indicates efficient combustion and consistent heat output. A flame that is too large or smoky can contaminate the solder joint or overheat the copper, causing oxidation or warping. Before lighting the torch, ensure that the workspace is clear of flammable materials and that ventilation is sufficient to disperse combustion gases.
The soldering process itself follows a carefully controlled sequence. First, apply flux evenly to all cleaned mating surfaces. This ensures oxidation is minimized during heating and solder flows smoothly into the joint via capillary action. Next, heat the joint by moving the flame methodically around the connection, allowing the copper to reach the solder’s melting temperature uniformly. It is critical to heat the base metals rather than directly heating the solder wire, as this promotes proper solder flow into the joint and prevents cold joints. Once the copper reaches the appropriate temperature, feed solder wire into the joint, allowing it to be drawn naturally into the seam by capillary action. The solder should form a smooth fillet around the joint edges, fully encasing the mating surfaces without gaps or voids.
During soldering, maintaining torch control is crucial. Excessive heat can cause the flux to burn off prematurely, resulting in oxidation and poor adhesion. Uneven heating may create weak spots or cause the solder to pool in certain areas. The operator should constantly monitor the flame position and the color of the copper to ensure uniform temperature distribution. Using a temperature-indicating crayon or infrared thermometer can aid in assessing when the joint is ready for solder application. After soldering, allow the joint to cool naturally; rapid cooling by water or forced air can cause thermal shock and microcracking.
Post-soldering cleaning depends on the flux type used. Water-soluble flux residues must be thoroughly rinsed to prevent corrosion, while rosin flux residues can be cleaned with solvents or left in place if the joint is protected. Inspect the joint visually for consistent solder coverage, absence of cracks, and smooth fillets. A well-soldered joint should exhibit a shiny, uniform appearance without excess solder or gaps. For critical applications, non-destructive testing methods such as pressure tests or dye penetrant inspections can verify joint integrity.

The copper evaporator tube adopts a unique fin design, and the external fins are equipped with specially designed interconnected channels, so that eac...
See Details
Standard refrigeration copper tube with an outer diameter of 12-28mm is made of high-quality TP2 copper (C12200/DHP), specifically designed for HVAC s...
See Details
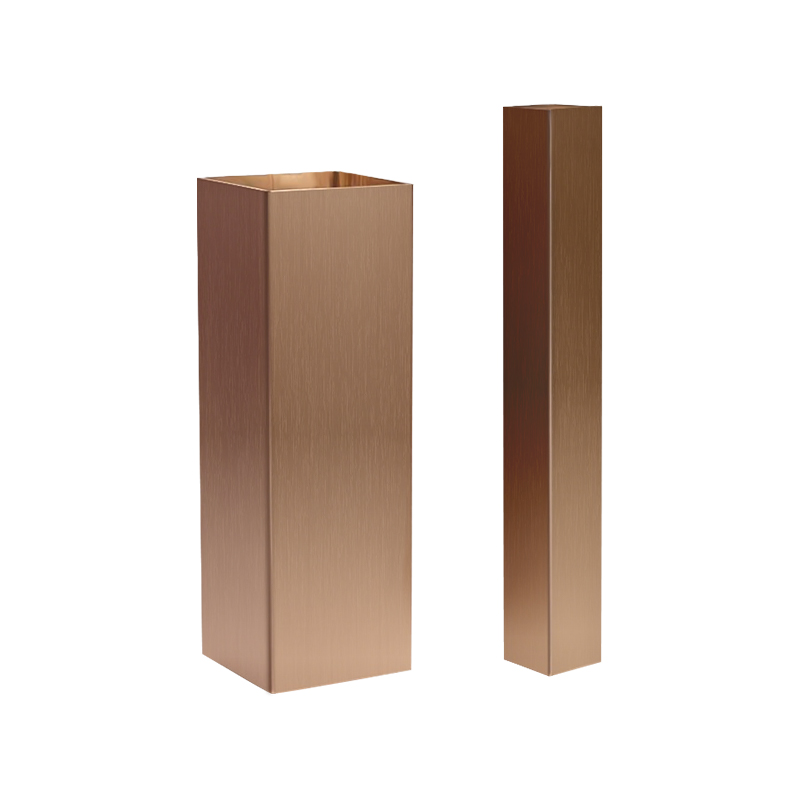
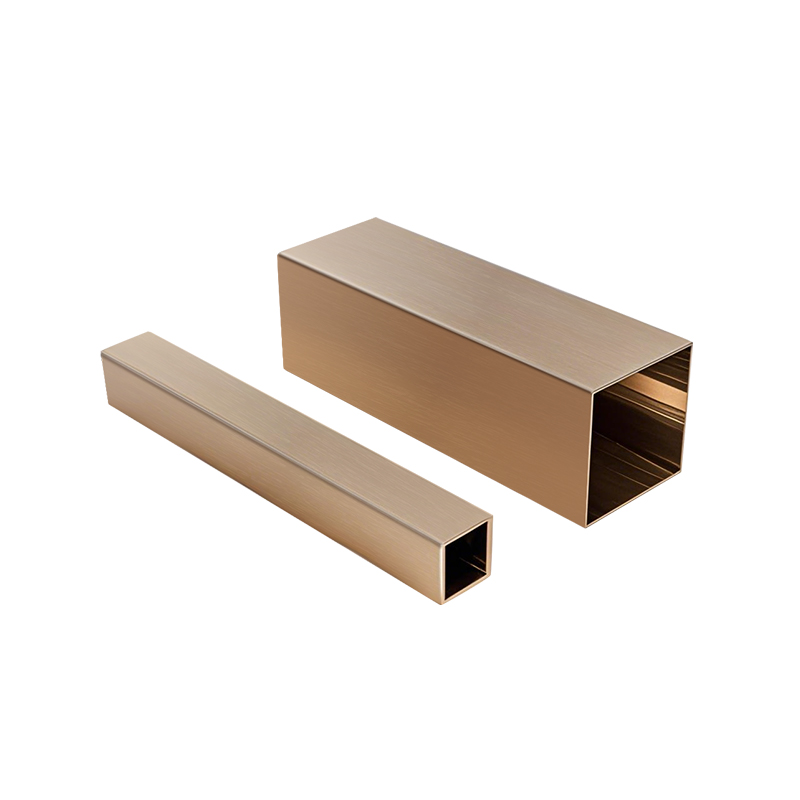
Copper square tube is a metal tube with a hollow square cross-section. It is made of high-purity copper or copper alloy materials through multiple pre...
See Details
Copper Tube is made of high-purity copper material with a copper content of not less than 99.9%. The main material codes are T11050 and C12200(DHP), a...
See Details
The Copper Water Tube produced by our company is a high-performance copper tube suitable for hot and cold water systems and heating applications. It h...
See Details
Copper capillary tube is usually manufactured by precision machining, and its dimensional accuracy can reach one thousandth of an inch. This ultra-hig...
See Details![]() Tangpu Industrial Zone, Shangyu District, Shaoxing City, Zhejiang Province, China
Tangpu Industrial Zone, Shangyu District, Shaoxing City, Zhejiang Province, China
![]() +86-13567501345
+86-13567501345
© Zhejiang Jingliang Copper-Tube Products Co., Ltd All rights reserved.
